

How to Install Suspended / Drop Ceiling Tiles
Ceilume's Feather-Light and Signature ceiling tiles and panels can be installed in an approved ceiling suspension system using standard 15/16 to 1 in. T-bar grid. Many Signature styles can also be used with slimline 9/16 in. grid.
Check building codes as required.
Clean Your Room and Ceiling Grid
Ceiling tiles may come out of the box with a slight static charge, which can attract dust and debris from construction and remodeling projects. We strongly advise that you finish all sawing, drilling, sanding, and sweeping, and thoroughly clean your room before installing your tiles. Don't worry, our tiles don't create dust of their own, and once installed any static charge will dissipate.
Thoroughly clean your T-bar grid. Remove contaminants (dust, oil, old paint, etc.), then wipe down with a damp rag to dissipate static electricity, which attracts dust to the T-bar. Even brand-new grid should be thoroughly cleaned.
Install Grid Covers or Strips (Optional)
EZ-On Drop Ceiling Grid Covers, decorative strips, and smooth strips are designed to cover the T-bar in drop ceiling tile installations. EZ-On can be installed before or after tiles are in place (but we think the former is easier!). Both decorative and smooth strips must be installed on an empty grid before you install your ceiling tiles. For installation, please see the instructions included with those accessories.
Temperature Warning
As a guideline, Ceilume ceiling tiles and panels are not affected by ceiling temperatures up to 120°F. In some installations involving halogen lights, metal heat registers, or other heat sources (stoves, ovens, etc.), localized ceiling temperatures can be much higher than anticipated. Please contact us for advice if your installation involves any of these special conditions.
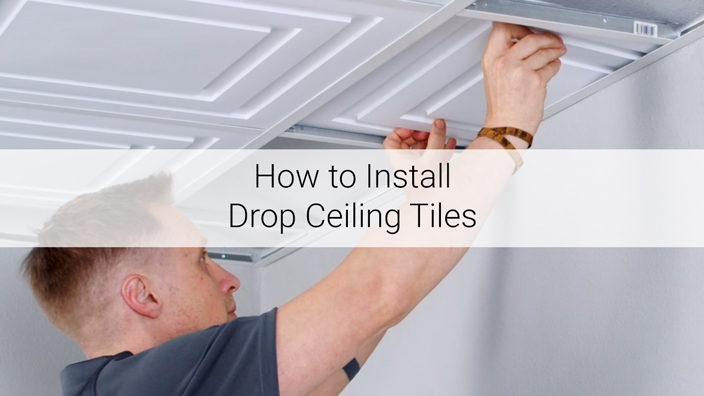
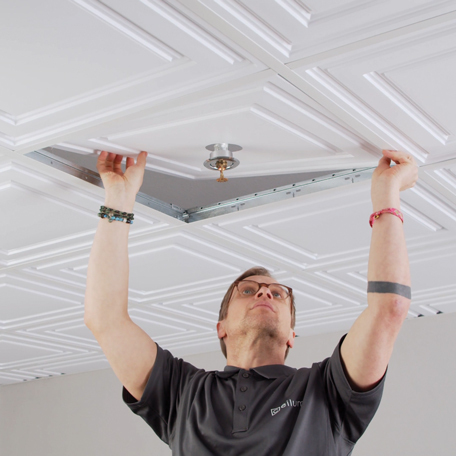
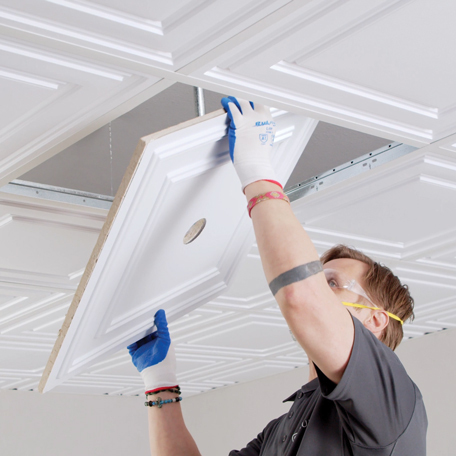
Install Main, Full-Size Tiles
-
Installing Ceilume Tiles on Their Own
To install, simply pop your ceiling tiles into place in your ceiling grid.
-
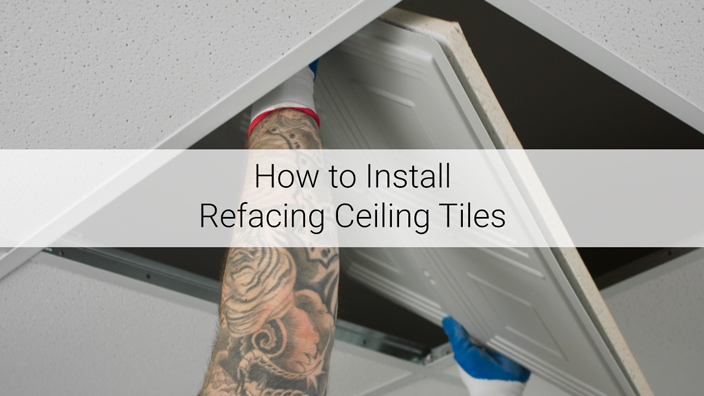
Refacing Existing Mineral Fiber Ceiling Tiles
If keeping the acoustic and thermal properties of your existing ceiling is important, and the previously installed tiles are in good (if not beautiful) condition, most Signature styles can be used for refacing. To reface, simply slide your new Ceilume ceiling tiles (with features projecting down into the room) under your existing mineral fiber tiles, and then resettle the pairs back into the grid.
-
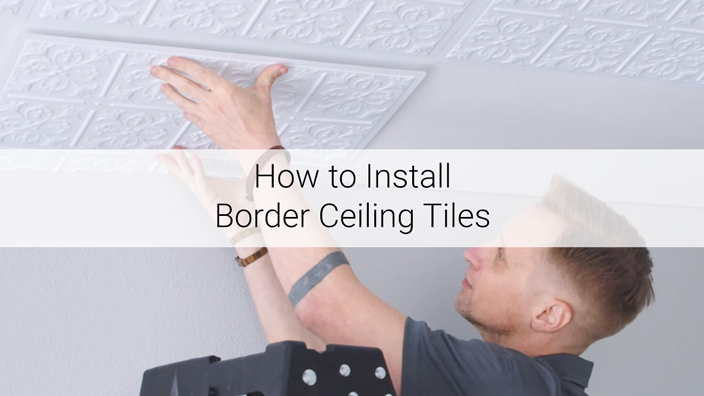
Install Border Tiles
In all likelihood, your ceiling will have some less-than-full-size grid squares (usually around the perimeter of the room). These areas require one of our border tile styles, which have shallow patterns that lend themselves to trimming and installing in these smaller areas. To install, measure partial grid squares, cut border tiles to size with scissors or snips, and then place the trimmed pieces into the grid.
Lighting
-
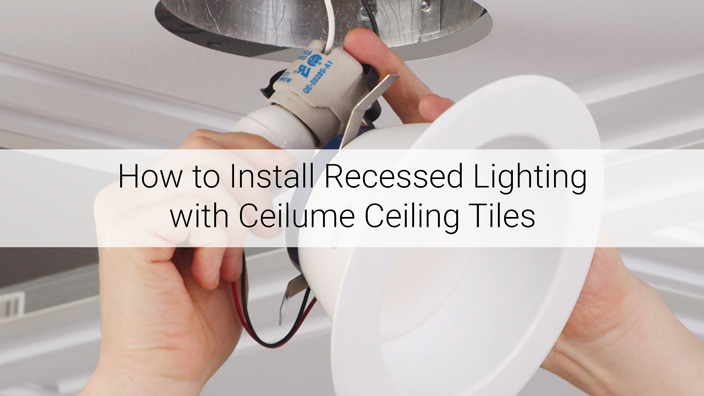
Recessed/Can Lights
Grid-mounted recessed/can lights function well with Ceilume tiles and panels. Simply choose a tile design that has sufficient flat area in the middle to fit the light opening and trim ring, and use a light that comes with a grid-suspension bracket that supports the weight of the light on the grid rather than on the tile.
Coffered ceiling tiles like Madison and Westminster may require additional steps to install with recessed/can lights. Please contact us if you require assistance.
-
Low-Profile LED (Puck) Lights
While we recommend recessed/can lighting with LED bulbs over low-profile LED puck lights, Ceilume can work with the latter. Please contact us for more information if you'd like to use puck lights with your new tiles.
-
Transluminous® Panels Beneath Light Fixtures
Ceilume's Translucent, Frosted, and Clear panels can be used beneath light fixtures or throughout the entirety of an installation for a fully-illuminated ceiling effect. Translucent and Frosted panels obscure the area above your suspended ceiling grid. Clear panels, while not "window clear," provide full visibility of everything above them.
For best results:
- Install panels at least 6 in. below lights
- Use LED bulbs/fixtures
- Pair Translucent and Frosted panels with AcoustoTherm® Backpanels
-
Insulation
-
Soniguard™ Drop Ceiling Insulation
Soniguard™ is a fiberglass-free insulation that is pre-cut for easy installation, and will dramatically increase both the acoustical and thermal properties of your new ceiling.
To install, place ceiling tiles and pieces of insulation into the grid in pairs: one piece of Soniguard™ (two pieces for 2 ft. x 4 ft. ceiling panels) resting on top of one ceiling tile.
-
Rolled/Batt Insulation
Rolled or batt insulation can be used in combination with Ceilume ceiling tiles to help control room sound and temperature, but it must be attached to the surface above the suspended ceiling grid.
Do not install rolled or batt insulation directly on the grid or across ceiling tiles, as the weight may cause the tiles to deform.
-
Fire-Suppression Sprinklers
Before using Ceilume ceiling tiles and panels in buildings with overhead fire-suppression sprinkler systems, the first and most important step is to consult your local building and fire officials to make sure that your intended use conforms with local building codes. Fire ratings, approvals, certifications, and compliance documents can be found on our website.
We offer three (and only three) safety-tested and approved methods of installation. If you have ceiling sprinklers, you must install your tiles in one of the following ways:
-
Drop-Out Ceiling Tiles Beneath Sprinklers
Per IAPMO UES Evaluation Report 310, all of Ceilume's 0.013 in. thick Feather-Light styles are suitable for use beneath Quick Response (QR) and Standard Response (SR) sprinkler systems rated with an activation temperature of 135°F or above, in Light Hazard and Ordinary Hazard Group I occupancies and where allowed by local safety authorities.
When exposed to the heat from a developing fire, drop-out tiles distort and fall from the ceiling grid. Heat from the growing fire activates the sprinklers, which, unimpeded by the tiles, perform their intended function.
Suspension systems for drop-out installations must:
- Support the tile on all edges
- Provide no more than 0.375 in. horizontal edge support
- Comply with ASTM C635, Heavy-Duty Classification (16 lb. per lineal ft.)
AcoustoTherm® Backpanels, EZ-On Drop Ceiling Grid Covers, and uplift prevention clips are also listed for use with Ceilume ceiling tiles and panels in drop-out installations.
-
Pass-Through Sprinklers - Ceiling Tiles with Oversized Holes
Most of Ceilume's ceiling tiles and panels can be cut to allow sprinklers to penetrate through them as long as pass-through holes meet the criteria outlined below.
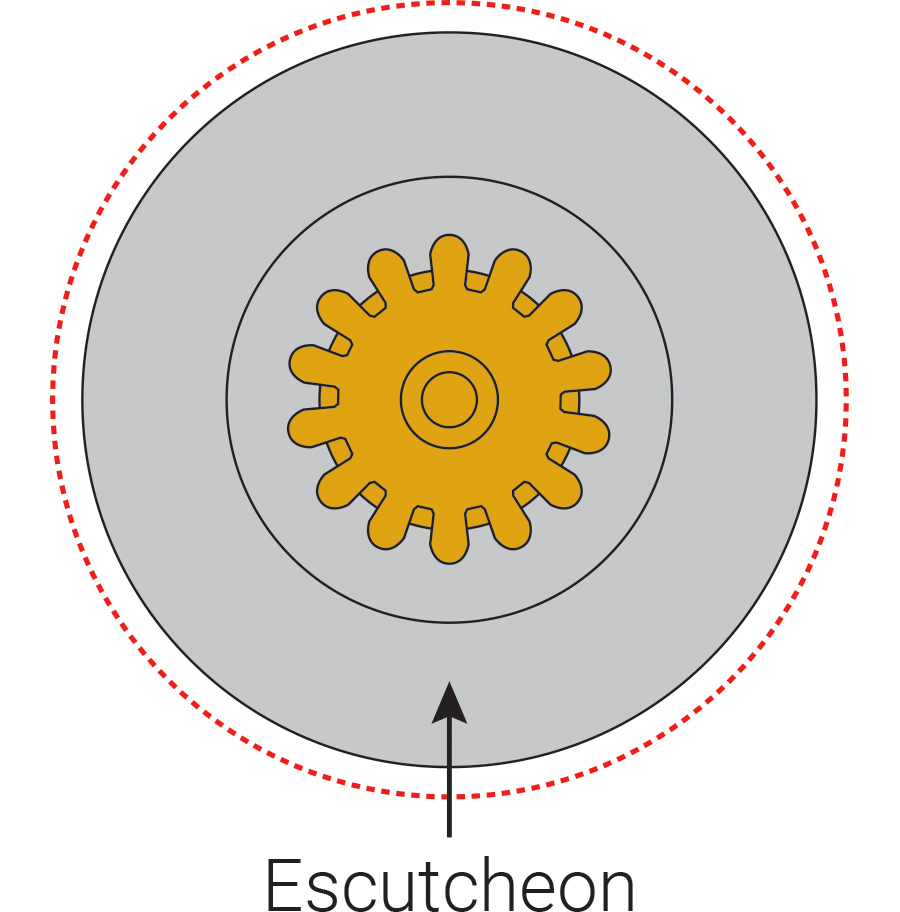
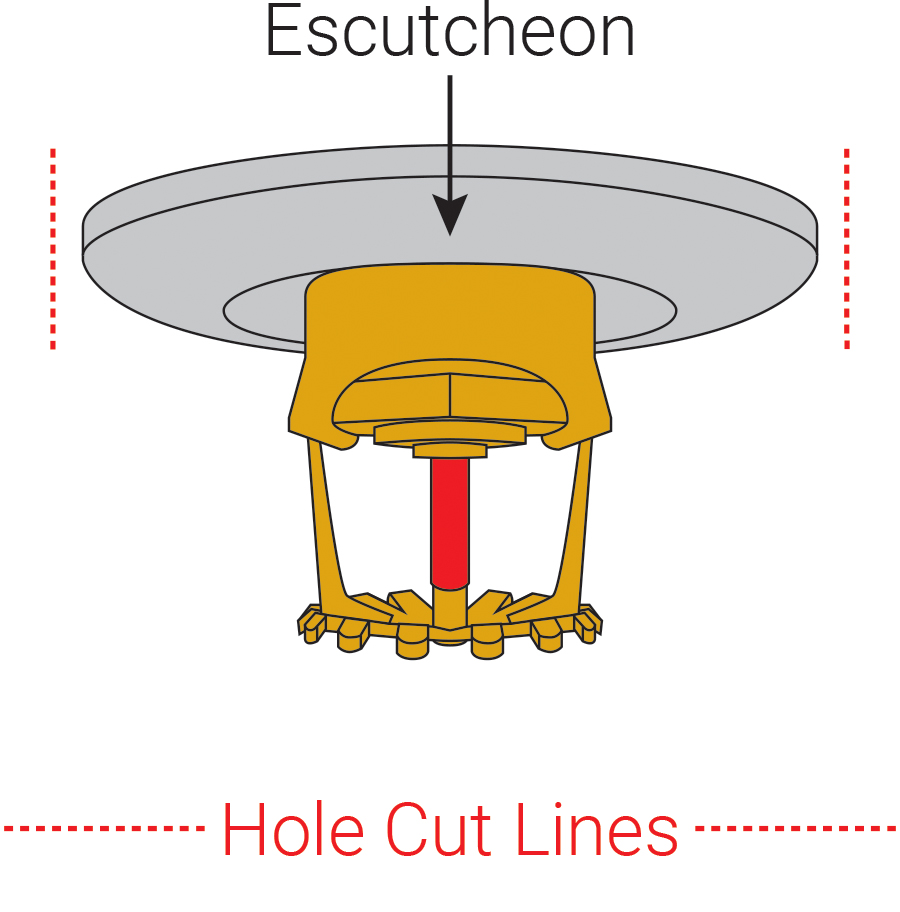
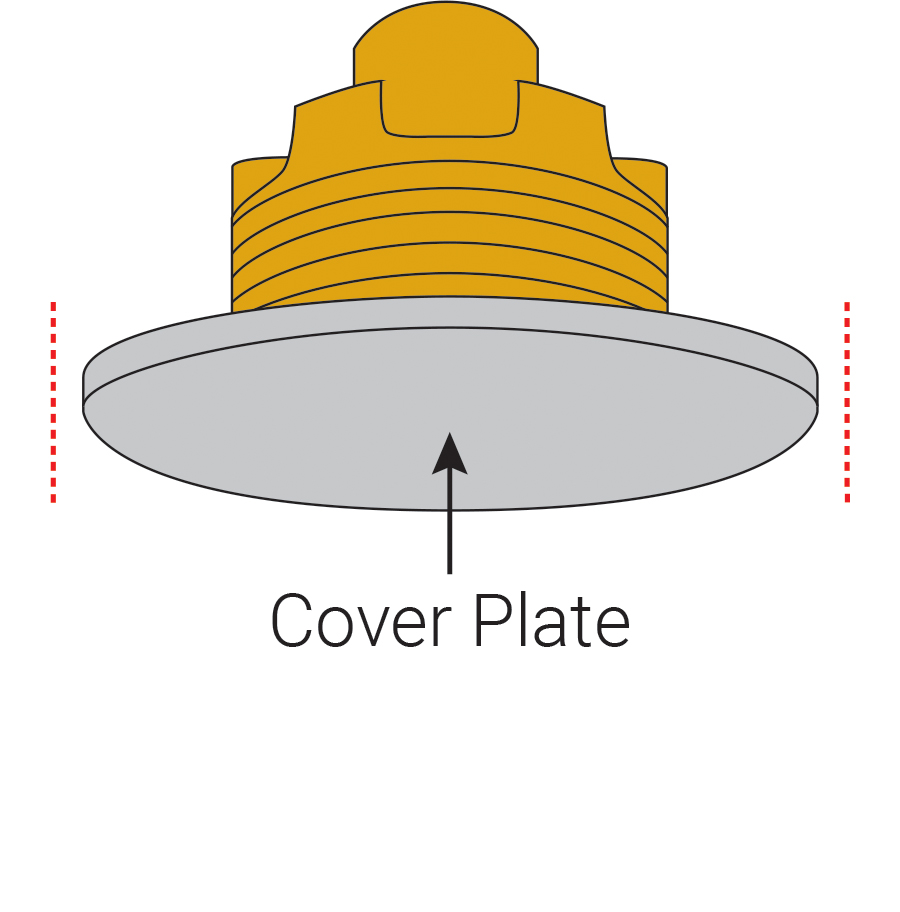
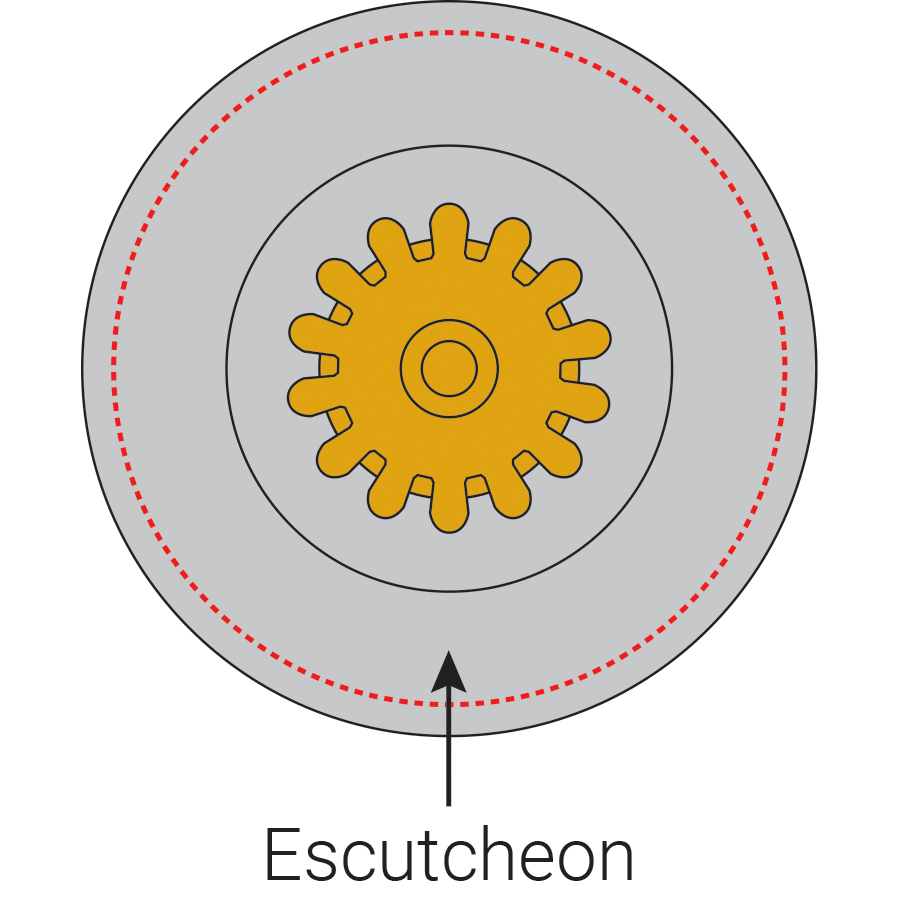
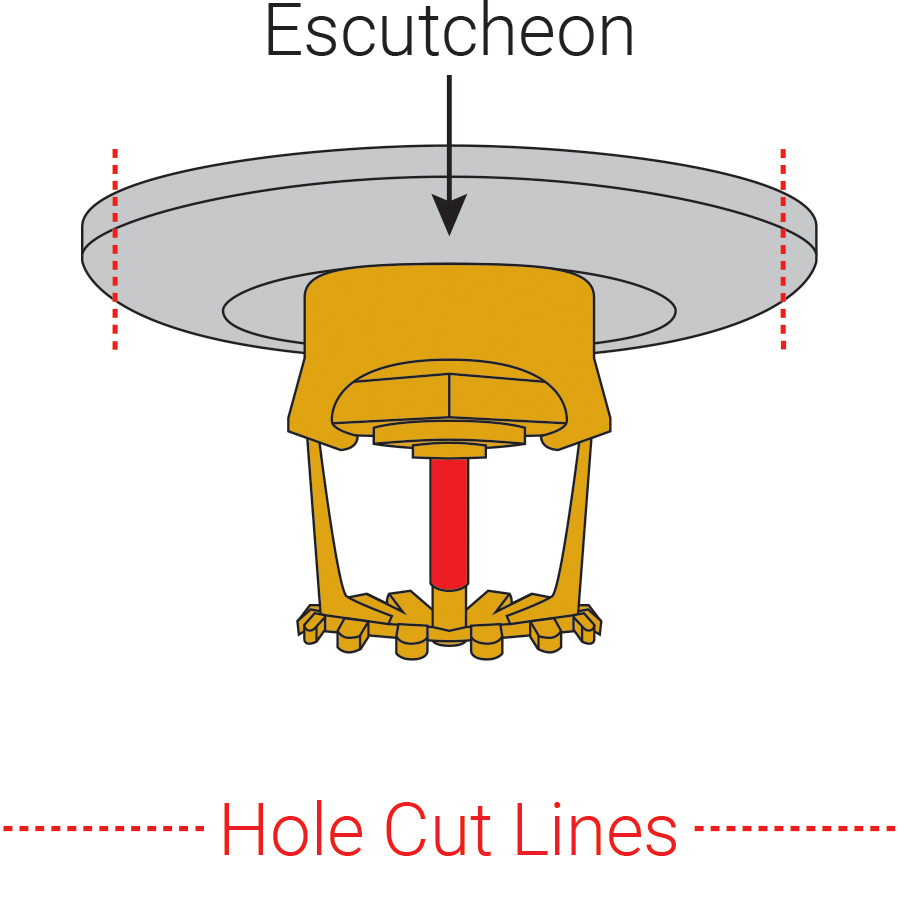
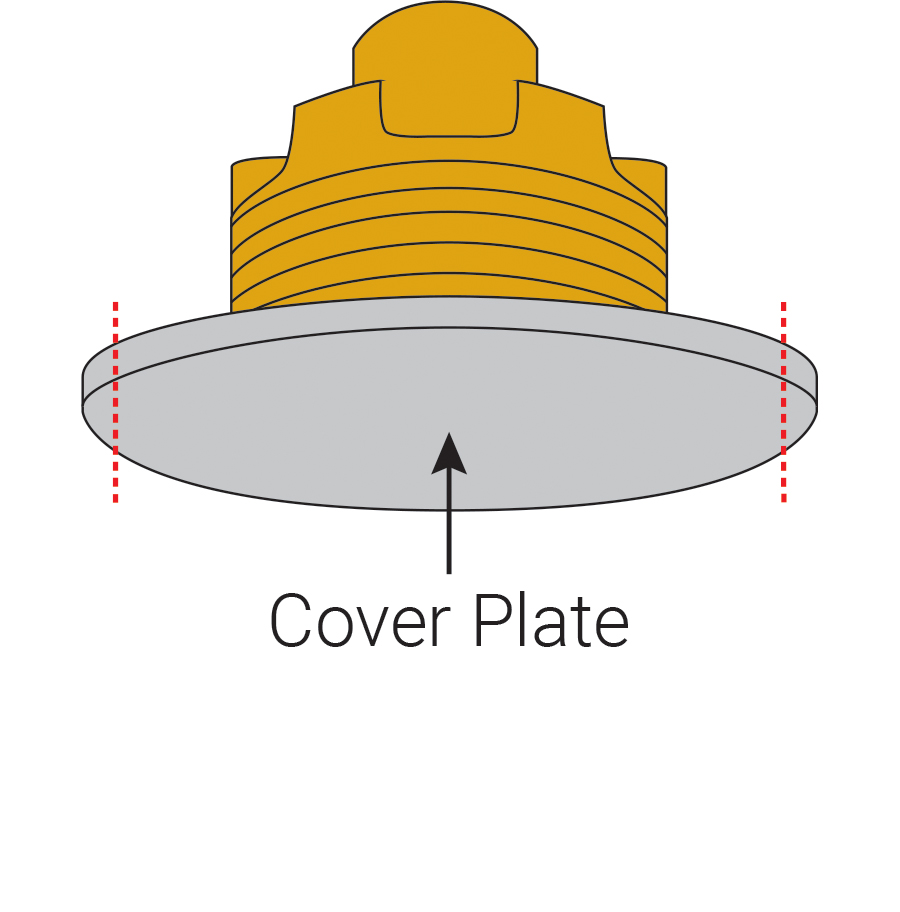
When sprinklers pass through ceiling tiles and you are not using a refacing style with a mineral fiber backing panel (see next section), per IAPMO UES Evaluation Report 310, sprinklers must be located a maximum of 3 in. below the ceiling grid, and holes must be at least 0.25 in. larger in diameter than trim rings/escutcheons/cover plates (or the sprinklers themselves if no trim rings/escutcheons/cover plates are being used).
An appropriately-sized hole saw can be used to cut clean, smooth, and neat sprinkler pass-through holes. Running the saw in reverse can help keep the tile material from binding as the hole is cut.
Never use a trim ring/escutcheon (pendant sprinkler) or cover plate (concealed sprinkler) at a sprinkler penetration without an appropriately-sized hole.
-
Pass-Through Sprinklers - Refacing Ceiling Tiles with Mineral Fiber Backing Panels
Most of Ceilume's 0.030 in. thick Signature styles can be used as refacing tiles in conjunction with mineral fiber backing panels (backing panels must also conform to appropriate local codes).
Important note: 0.013 in. thick Feather-Light styles cannot be used as refacing tiles.
In locations where sprinklers pass-through ceiling tiles, cut holes in both the refacing tiles and the mineral fiber backing panels, slide the refacing ceiling tiles (with features projecting down and into the room) under the mineral fiber backing panels, then resettle the new pairs back into the grid.
If you are using a refacing style with a mineral fiber backing panel above it, per IAPMO UES Evaluation Report 310, sprinklers must be located a maximum of 3 in. below the ceiling grid, and sprinkler passthrough holes must be 0.25 in. smaller in diameter than sprinkler trim rings/escutcheons/cover plates.
An appropriately-sized hole saw can be used to cut clean, smooth, and neat sprinkler pass-through holes in both your refacing ceiling tiles and mineral fiber backing panels. When cutting the holes in your Ceilume tiles, we suggest running the saw in reverse in order to keep the material from binding as the hole is cut.
-
Rectifying Fire-Suppression Sprinkler Non-Compliance
If your sprinklers pass through your Ceilume ceiling tiles, but the corresponding holes are not large enough and you are not using a refacing style with a mineral fiber backing panel, there are two acceptable remedies:
- Enlarge sprinkler pass-through holes
- Use a refacing style with a mineral fiber backing panel

-
Maintenance
-
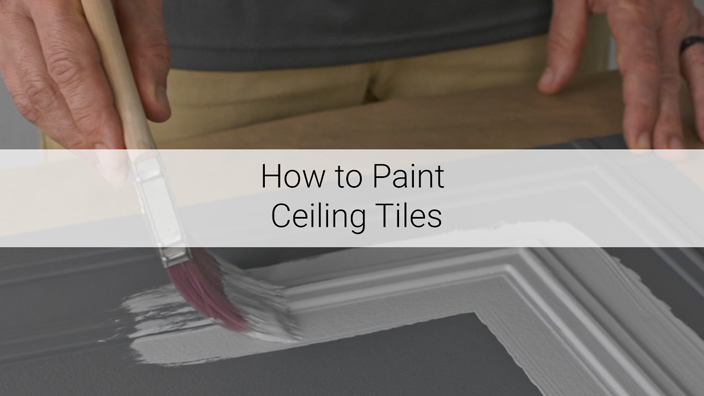
Painting
All non-laminated Ceilume tiles, panels, strips, and grid covers can be painted before or after installation.
For best results:
- Make sure that everything is clean and dry
- Do not use solvent-type thinners or cleaners
- Experiment on a sample before working on your ceiling in its entirety
Painting precautions:
- Ceilume cannot guarantee that the published fire safety ratings and product specifications, certifications, listings, and approvals will remain the same after painting. Therefore, field painting will void the warranty.
- Ceiling tiles and panels being used in a drop-out installation MUST NOT BE PAINTED. Painted tiles and panels are prohibited from use beneath ceiling fire suppression sprinklers.
-
Cleaning
Ceilume tiles, panels, strips, and grid covers require no special cleaning agents - just wipe them down with a soft, damp rag. Small, stubborn spots can be handled with mild soap, and tiles are 100% waterproof so there is no risk of water damage during cleaning!
Do not use cleaners containing organic solvents or other aggressive ingredients as they may affect the surface appearance of your tiles and accessories. Examples of these types of cleaners include chlorine bleach, liquid grease remover, strong detergents, and nail polish remover.
-
Storing
Store any extra boxes of ceiling tiles upright in a single layer (do not stack). Choose a cool spot out of direct sunlight.
We Are Here to Help!
We hope that the information above is clear and provides the answers to any questions you may have along the way, but if it does not, please do not hesitate to contact us directly for help.
- Hours: 8:00 AM - 4:30 PM, Pacific Time
- Phone: 1-800-557-0654
- Email:
